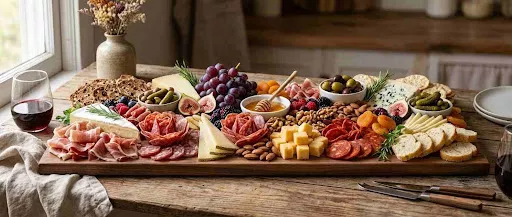
A beautifully styled charcuterie board takes thought from the start, not just a last minute grab of items. If you want it to look really good, you need a plan in mind. Just stacking meats and cheeses on a plain wooden plate will probably feel flat. You'll end up with that cluttered pile vibe, not the kind of centerpiece people actually want to photograph and keep talking about.
Charcuterie board styling is a highly specific, hands-on skill. It takes balancing salty bites, bright colors, and physical height. Let's look at why a strategic approach completely changes your hosting game. When you learn how to arrange a charcuterie board with intention, your friends will pause. They will snap a picture before grabbing a cracker.
You need a solid foundation before unwrapping even a single ingredient. The golden rule for a beautifully styled charcuterie board is the classic 3-3-3-3 method. It includes:
Treat your wooden platter like prime real estate. The heavy hitters get the absolute best locations. A massive wheel of brie commands more attention than a handful of almonds. Anchor your biggest items first to map out your layout. Skip this approach, and your board will turn into a confusing mess.
Start with a blank canvas. Work from the inside out. Layering is entirely about creating visual movement and guiding your guest's eye across the spread.
Place your immovable objects down first. Set your small bowls for honey, fig jam, or spicy mustard on opposite ends. Then, add your structural cheeses. A wedge of sharp cheddar or a firm round of goat cheese acts as a visual pillar. Once you set these down, do not move them.
Now we add the savory protein. This is where charcuterie board styling is really fun. Salami rosettes and folded prosciutto ribbons create gorgeous textures. Build a "meat river" flowing gracefully from one corner to the other. Flowing shapes make the food look dynamic.
That said, do not just dump a basic box of water crackers in a sad pile. Fan them out in sweeping curves directly around your cheese and bowls. Think of them as the winding roads connecting your little food neighborhoods.
Dead space is the enemy of a beautifully styled charcuterie board. Use fresh produce and salted nuts as your edible spackle. Slip in clusters of green grapes, bright raspberries, or candied walnuts into the empty corners and do it with purpose. Cover every single square inch, seriously don't leave any space unfilled.
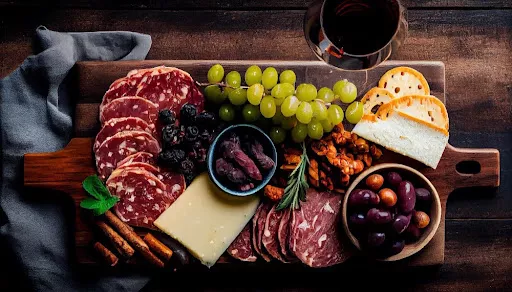
A truly premium look comes from height and texture. Flat boards look incredibly cheap. You might be expecting dramatic peaks and deep valleys across your platter.
You can pull this off by changing exactly how you cut and fold raw ingredients. A block of pepper jack cut into identical squares looks like a kids' lunchbox snack. But if you crumble a hard Parmesan into rustic shards? Suddenly, you have a high-end appetizer.
Let's compare a basic approach to a highly elevated strategy:
| Ingredient Type | Basic Board Styling | Elevated Board Styling |
|---|---|---|
| Hard Cheese | Perfectly uniform cubes | Rustic, uneven crumbles |
| Cured Meats | Laid flat in a basic circle | Folded into ribbons or roses |
| Breads | Single row of plain crackers | Twisted breadsticks and crostini |
| Sweet Elements | A tiny spoon of plain honey | Huge honeycomb chunk with figs |
See the stark difference? Small tweaks in physical presentation drastically boost the perceived value of your spread. It takes maybe five extra minutes, but the visual payoff is massive.
You have to actively fight the dreaded beige trap. Bread, plain crackers, roasted nuts, and most cheeses all share the exact same boring color palette. If you are not careful, your beautifully styled charcuterie board will look incredibly dull. No one wants to photograph a brown plate of food.
Color blocking saves the day every single time. Separate your brown and yellow items with vibrant pops of contrasting color. Use bright red pomegranate seeds, freshly sliced strawberries, or bright green herbs.
Tuck sprigs of fresh rosemary right next to a pale white wheel of brie. Drop a generous handful of bright purple blackberries next to your tan wheat crackers. These sharp contrasts make the food pop on camera.
Hosting your closest friends should feel joyful, not stressful. You now know the exact secrets behind expert charcuterie board styling. You can arrange a charcuterie board that completely stops people in their tracks.
But sometimes you just want to sit back and enjoy the party without the exhausting prep work. Sourcing the perfect artisanal cheeses and building elaborate salami roses takes serious time. That is exactly where the culinary experts step in. Let someone else totally handle the meticulous layering and flavor balancing for your next big event. Visit Ace & Olive to explore stunning, ready-to-serve options that make hosting completely effortless.
Most boards hold up fine, assembled a day ahead, wrapped tightly and refrigerated. Save crackers, bread, and delicate garnishes right before serving so nothing goes soft.
Three to five cheeses is the sweet spot, mixing textures like soft, firm, and aged. That gives guests variety without drowning out any single flavor.
Something around sixteen to twenty inches typically covers ten guests as an appetizer. Go bigger if the board is the main food rather than a starter.
Cheese first, generally, since its larger shapes define the board's overall structure. Meats fold or roll into whatever gaps remain once the cheese is placed.
Small cheese knives, a honey dripper, and an offset spatula handle most slicing and spreading. Tongs also help guests grab delicate items like prosciutto without making a mess.